Using the color wheel makes color correcting much easier and precise. You can quickly spot unwanted color casts and neutralize them by selecting the opposite hue, ensuring natural, balanced tones. It helps you balance shadows, midtones, and highlights with confidence, avoiding guesswork. By applying simple complementary or analogous schemes, you’ll create harmonious visuals effortlessly. Keep exploring, and you’ll find ways to refine your skills and achieve professional results without guesswork.
Key Takeaways
- Use the color wheel to identify opposite hues for precise, targeted color correction instead of guessing.
- Select corrective colors directly opposite the unwanted tint to neutralize color casts efficiently.
- Make small, incremental adjustments and compare before-and-after to avoid overcorrection.
- Utilize visual cues like skin tones and neutral areas to guide accurate hue corrections without guessing.
- Leverage the color wheel for consistent, harmonious corrections, enhancing natural look and reducing trial-and-error.
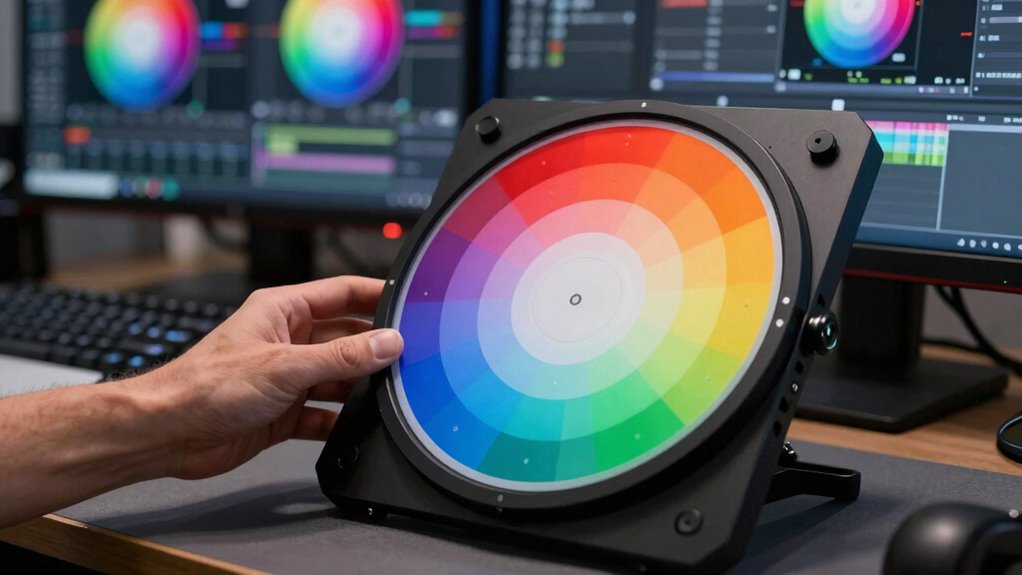
Why the Color Wheel Is Your Best Friend for Color Correction

The color wheel is an essential tool for anyone looking to improve their color correction skills. It helps you understand color harmony, guiding you to create balanced and visually appealing images. By using the wheel, you can identify complementary, analogous, or triadic color schemes that enhance the overall mood of your footage. This knowledge is especially valuable as it aligns with the principles of color harmony, which is fundamental for creating cohesive visuals. Understanding the relationships between colors allows you to fine-tune colors to evoke specific emotions or atmospheres, making your visuals more engaging. Instead of guessing, the wheel gives you a clear visual reference to adjust hues accurately. Utilizing contrast ratios effectively can also dramatically improve the depth and clarity of your images, ensuring they stand out. An understanding of color relationships can help you develop more sophisticated color palettes, elevating your creative possibilities. Recognizing how local automation can enhance your workflow ensures your color correction process is both efficient and consistent. Whether you’re aiming for a vibrant, energetic look or a calm, soothing vibe, the color wheel ensures your color choices work together seamlessly, boosting your confidence and creativity in every project. Embracing artistic expression can help you develop a more intuitive sense of color, elevating your editing skills to new levels.
How to Spot and Fix Color Casts Using the Color Wheel
You can spot color casts easily by looking for unnatural tints in your image, like a blue tint in skin tones or a greenish hue in shadows. Once identified, use the color wheel to choose the opposite color to cancel out the cast. Applying the correct complementary color will neutralize unwanted tints and restore natural colors. Leveraging color correction techniques can further improve your accuracy in balancing tones and achieving the desired look. Recognizing how astrological signs influence perception can also help in understanding color preferences and harmony. Additionally, understanding color theory fundamentals can deepen your ability to make precise adjustments and create visually balanced images, especially when considering color harmony principles that guide effective color pairing.
Identifying Color Casts
Color casts can be tricky to spot at first glance, but understanding how they appear on the color wheel makes it easier to identify and correct them. When evaluating your image, pay attention to areas with unnatural color temperature or distorted skin tones. These clues indicate a color cast. To help you identify them:
- Look for a color shift in neutral areas like grays or whites.
- Notice if skin tones appear too warm (orange/yellow) or cool (blue/green).
- Check if shadows or highlights have an unwanted hue.
- Observe overall color balance—if one hue dominates, a cast is present.
- Recognizing natural Free Floating colors in different lighting conditions can improve your correction accuracy.
Applying Corrective Colors
To effectively fix color casts, start by understanding how to use the color wheel to identify which corrective hue to apply. Color theory explains that opposite hues neutralize each other, helping you counteract unwanted casts. When your image appears overly warm, add a cool hue like blue; if it’s too cool, introduce warm tones like orange or yellow. Trust your visual perception to determine the dominant cast first. Remember, the goal is to balance the colors so they look natural. Use the color wheel as a guide, selecting the hue directly opposite the problematic color. Applying the right corrective color enhances the image’s overall balance and clarity, making adjustments more intuitive and precise. This method simplifies color correction by combining color theory with your eyes’ perception.
Balancing Colors With Complementary Colors for a Natural Look

Balancing colors with their complementary hues is an effective way to achieve a natural, harmonious look in your edits. When you use complementary colors, you enhance color harmony and create visual balance, making your footage feel more natural and pleasing to the eye. To do this effectively, consider these steps:
Balancing colors with their complementary hues creates natural harmony and visual balance in your edits.
- Identify the dominant color in your shot.
- Find its complementary hue on the color wheel.
- Slightly introduce this hue into your correction to neutralize unwanted tones.
- Keep adjustments subtle to maintain naturalness.
- Remember that color harmony is essential for creating visually pleasing and balanced images.
How to Adjust Shadows, Midtones, and Highlights for Perfect Color Balance
Adjusting shadows, midtones, and highlights is essential for achieving a well-balanced, natural-looking image. Begin with shadow adjustment to deepen or brighten dark areas, ensuring details remain visible without losing contrast. For midtone balancing, focus on the middle range of tones to correct color casts or dullness, creating a more harmonious overall look. Adjust highlights to recover details in the brightest parts of your image, preventing blown-out whites. Use the color wheel or sliders to fine-tune these tonal ranges, matching their color balance for a cohesive appearance. Remember, small adjustments in shadows, midtones, and highlights can considerably impact the overall mood and realism of your image. Consistent, subtle tweaks will help you achieve a polished, professional result. Additionally, utilizing tools to detect passive voice can improve clarity and engagement in your editing instructions.
Speed up Your Workflow With Presets and Guides

Using presets and guides can substantially speed up your editing process by providing ready-made adjustments that achieve professional results instantly. These tools leverage color theory and color psychology to create appealing color schemes effortlessly. To maximize efficiency, consider these tips:
- Use built-in presets tailored to different moods or themes, saving time on manual adjustments.
- Apply color guides to quickly select complementary or analogous palettes aligned with your project’s message.
- Save custom presets for recurring projects to streamline your workflow.
- Refer to guides for consistent color harmony, ensuring your edits evoke the desired emotional response.
- Incorporate connected technology to monitor your workflow and optimize your editing environment for better productivity. Additionally, understanding color harmony principles can help you make more informed adjustments that resonate with viewers.
- Familiarizing yourself with at-home beauty tech can inspire innovative approaches to digital editing, enhancing your creative versatility.
- Recognizing color distribution techniques can further refine your editing process, making your color corrections more balanced and professional.
- Paying attention to auditory processing can also influence how you perceive visual balance and harmony in your edits, leading to more cohesive results.
Common Color Correction Mistakes and How to Avoid Them

While it’s easy to get excited about enhancing your images, many beginners fall into common pitfalls that can ruin an otherwise great shot. One frequent mistake is altering the color temperature too drastically, which can make your image look unnatural or overly warm or cool. Keep an eye on maintaining a balanced color temperature to preserve realism. Another mistake is overdoing saturation levels, causing colors to appear exaggerated or garish. Instead, make subtle adjustments to enhance the image without losing authenticity. Also, avoid shifting hues excessively, as it can distort the scene’s true colors. Focus on making small, intentional changes, and always review your work in different lighting conditions to ensure your corrections enhance rather than detract from the original shot. Being mindful of color correction techniques can also help prevent over-editing, ensuring your images remain true to life. Paying attention to color balance can further help you achieve more natural results in your edits. Additionally, understanding the importance of passive voice detection can improve your editing precision and efficiency. Incorporating consistent editing practices can lead to more cohesive and professional-looking images across your projects, especially when applying foundational principles like color correction to achieve harmonious results.
Pro Tips for Making Precise, Guess-Free Color Adjustments
Achieving precise, guess-free color adjustments starts with relying on objective tools rather than intuition alone. Understanding color theory helps you make intentional choices, while knowledge of color psychology guides you in creating the desired mood. Here are pro tips to refine your adjustments:
- Use the color wheel as a reference to select complementary or analogous hues, reducing guesswork.
- Rely on histograms and scopes to monitor tonal balance objectively.
- Make incremental tweaks, then compare before and after to ensure consistency.
- Apply targeted adjustments based on color psychology to evoke specific emotions without overcorrecting.
How the Color Wheel Gives You Creative Control Over Your Image
The color wheel is a powerful tool that puts creative control directly into your hands, allowing you to craft the mood and harmony of your image intentionally. By understanding color harmony, you can select complementary, analogous, or triadic schemes to evoke specific emotions and guide viewers through your visual storytelling. The wheel helps you choose colors that work together seamlessly, whether you’re enhancing warmth, coolness, or contrast. This control means you’re not just correcting colors but actively shaping the narrative and atmosphere of your image. With the color wheel, you can experiment confidently, knowing your choices are grounded in visual principles. It becomes a creative compass, empowering you to produce images that are both visually appealing and emotionally impactful.
Practice Exercises to Master Color Correction Techniques

Practicing color correction techniques is the best way to build confidence and refine your skills. By applying what you learn with editing software, you deepen your understanding of color theory and how different adjustments affect your image. To get started, try these exercises:
- Use a test photo to practice balancing skin tones with the color wheel.
- Experiment with correcting color casts by adjusting shadows, midtones, and highlights.
- Create different moods by shifting color temperature and saturation.
- Challenge yourself by matching the color palette of two different images.
These exercises help you develop an instinct for color correction and improve your ability to use the wheel effectively, making your edits more precise and professional.
Frequently Asked Questions
Can the Color Wheel Help Correct Color Issues in Video Footage?
Yes, the color wheel can help correct color issues in your video footage. By applying color theory, you can identify complementary colors and make adjustments to enhance visual consistency. Using the wheel, you can target specific color problems, such as unwanted tints or mismatched hues, ensuring your footage looks balanced and professional. It’s a practical tool that simplifies color correction, making your videos visually cohesive without guesswork.
What Are the Best Tools to Use Alongside the Color Wheel?
Sure, because relying solely on the color wheel is like wearing sunglasses indoors. To achieve true visual harmony, you should pair it with tools like scopes for precise color grading, LUTs for creative looks, and masks for targeted corrections. These tools help you avoid the chaos of mismatched hues, ensuring your footage’s color story is as smooth and polished as a well-mixed cocktail.
How Do I Choose the Right Color Correction Settings for Different Skin Tones?
To choose the right color correction settings for different skin tones, start by evaluating the skin’s natural undertone and adjust the color temperature accordingly. For warmer skin tones, add cooler tones to balance out the warmth, and vice versa for cooler skin tones. Use the color wheel to find complementary shades, ensuring the correction enhances the skin’s natural glow without oversaturating. Always preview your adjustments before finalizing.
Is There a Quick Way to Learn Advanced Color Correction Techniques?
Getting a grip on advanced color correction techniques is a tall order, but you can speed up the process by mastering color theory and refining your editing workflows. Jump into tutorials, practice with real footage, and don’t be afraid to experiment — sometimes, it’s a case of learning as you go. Keep building your skills step-by-step, and you’ll find yourself working smarter, not harder, in no time at all.
How Can I Troubleshoot Uneven Color Correction Results?
To troubleshoot uneven color correction results, start by examining color mismatches and lighting inconsistencies in your footage. Use your color wheel to identify areas that need balancing, and adjust accordingly. Check for subtle shifts in color temperature or highlights that may cause unevenness. Fine-tune your corrections gradually, ensuring consistent lighting and color across clips. This approach helps you achieve a natural, seamless look without guesswork.
Conclusion
Mastering the color wheel transforms your editing from guesswork to precision. Many believe that perfect color correction is complex, but it’s more about understanding fundamentals than luck. When you trust the wheel, you gain confidence and creative control, releasing your true vision. Embrace this tool, practice consistently, and you’ll see how effortlessly you can craft stunning, natural-looking images. Believe in the process—accuracy isn’t just possible, it’s within your reach.