To keep your ombré nails from turning muddy, focus on selecting colors that blend well and stay close on the color wheel, and use semi-transparent or creamy formulations for smooth gradations. Proper nail prep, like buffing and applying a base coat, helps create a flawless surface. Use gentle, sweeping brushes or sponges for blending, and work with minimal product for cleaner results. For more tips on mastering perfect ombré nails, keep exploring the secrets to flawless blending.
Key Takeaways
- Choose colors close on the color wheel and use semi-transparent shades for smooth, gradual blending.
- Apply minimal product and blend gradually with light, sweeping motions to prevent harsh lines and muddiness.
- Use quality, nail-friendly brushes or sponges for controlled, seamless transitions.
- Prepare nails thoroughly with buffing and a high-quality base coat for a smooth surface.
- Regularly clean tools and practice blending techniques to maintain clarity and avoid overworking the polish.
Why Do Ombré Nails Turn Muddy: and How Can You Prevent It?

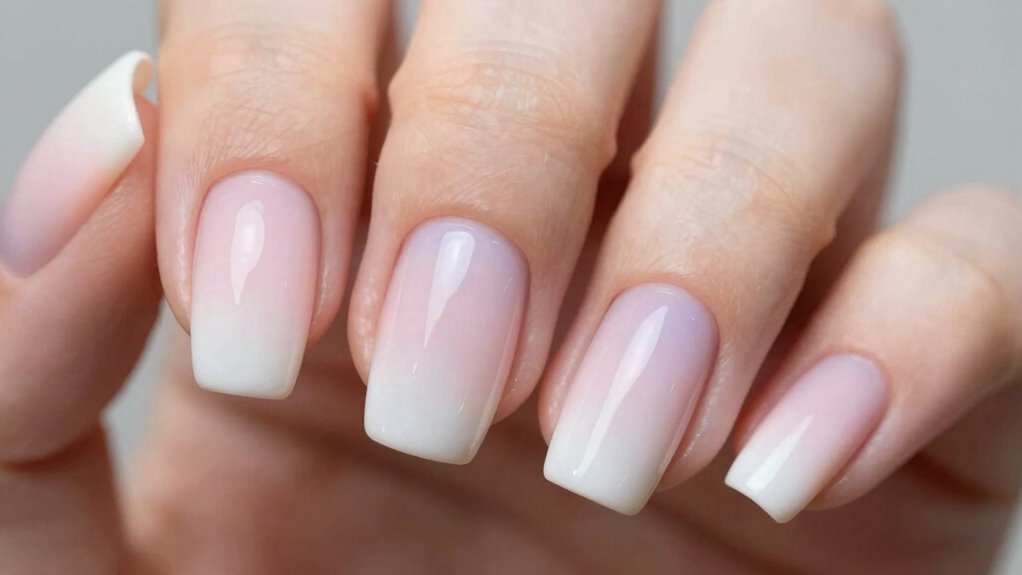
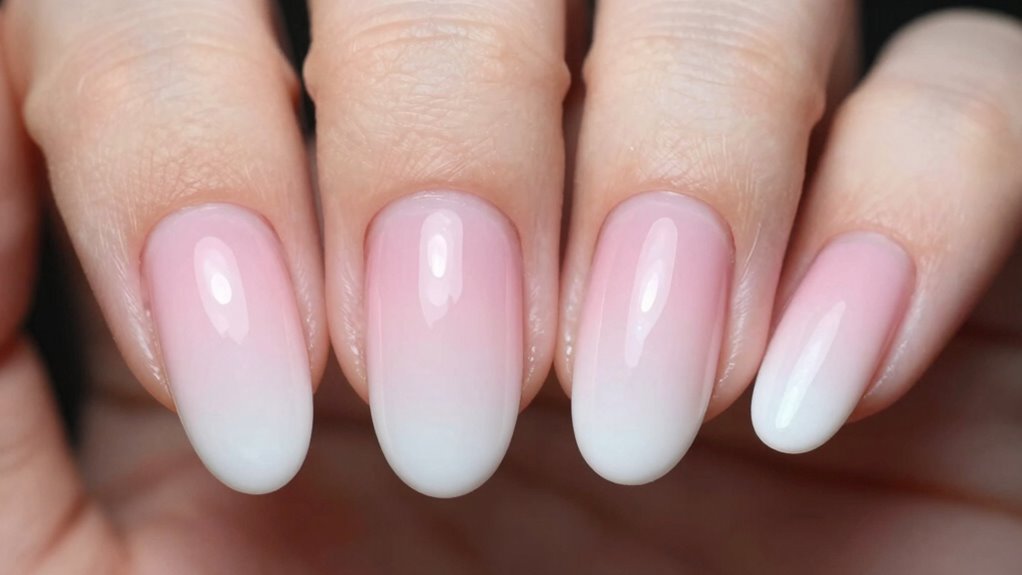
Have you ever noticed your ombré nails turning muddy or dull over time? This often happens because of poor blending or choosing colors that clash on the color wheel, causing the progression to look muddy rather than seamless. When the shades don’t complement each other or blend well, it affects your nail health by making the polish appear dull and uneven. To prevent this, select colors that are close on the color wheel, ensuring they blend smoothly. Also, use high-quality products and apply thin, even layers to maintain nail health. Proper preparation and avoiding overworking the polish help keep your nails vibrant and prevent the muddy appearance. Additionally, understanding color theory fundamentals can help you choose the right shades for a seamless blend. Remember, understanding color relationships and proper application techniques can help you choose the right shades for a seamless blend.
Pick the Right Colors and Formulations for Seamless Blending
Choose colors that complement each other to create a smooth gradient, and pick formulations that apply easily without streaks. Testing your blending techniques beforehand helps you find the right pressure and tools for seamless shifts. When you select the right shades and textures, your ombré nails will look polished and professional. Additionally, understanding proper application techniques ensures a consistent and flawless transition between colors. Practicing color blending techniques can further enhance your results for a more natural and seamless gradient.
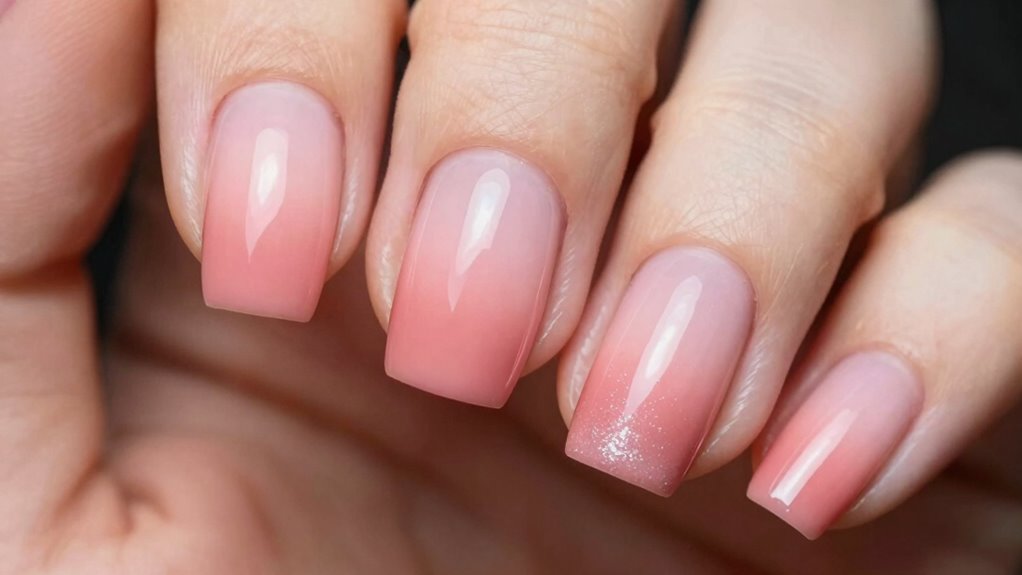
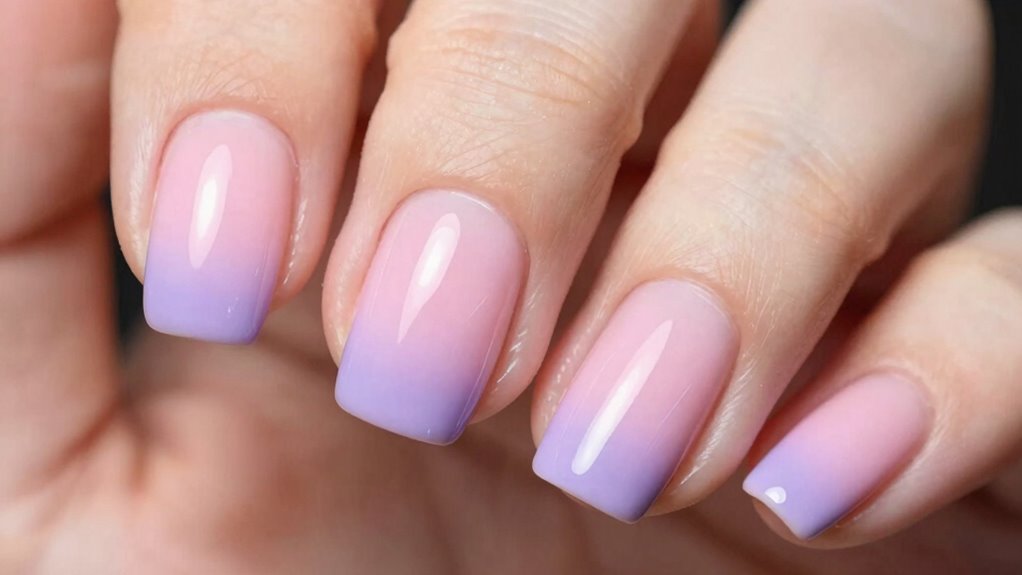
Choose Complementary Colors
Selecting the right colors for ombré nails is essential to achieve a smooth, seamless progression. When choosing, focus on color pairing that enhances shade harmony, ensuring each shift feels natural and flattering. Complementary hues, such as soft pinks fading into nude or deep blues blending into lighter shades, create visual interest without muddiness. Additionally, understanding color accuracy can help in selecting shades that truly match your desired look and avoid unintended muddy effects. Incorporating visual cues can further assist in achieving precise blending and color transitions.
Opt for Smooth Formulations
To achieve a flawless ombré effect, opting for smooth formulations is essential because they blend effortlessly and create a seamless shift between shades. When choosing colors, consider color theory principles to select harmonious shades that progress well. Smooth gels, creams, or acrylics help prevent muddy blends, a common issue in nail art history. Here are some tips:
- Use gel polishes with a creamy consistency for easier blending.
- Stick to semi-transparent shades to allow a gradual fade.
- Avoid thick or overly pigmented colors that can create harsh lines.
- Test different formulations to find what works best for your technique and desired gradient.
- Selecting the right nail formulations is crucial for achieving a professional and smooth ombré look, preventing muddiness and showcasing your skill.
- Understanding the consequences of improper blending can help you refine your technique and achieve better results.
- Proper application techniques ensure the colors transition smoothly, enhancing the overall gradient effect.
- Incorporating knowledge of nail art history can help you avoid common pitfalls and elevate your design skills.
Test Blending Techniques
Testing your blending techniques is essential for achieving a seamless ombré effect, and it all starts with picking the right colors and formulations. Understanding color theory helps you choose shades that naturally blend without turning muddy; for example, pairing analogous colors creates smooth progressions. When experimenting, focus on brush techniques—using light, sweeping strokes and gradual layering to blend the colors seamlessly. Practice different brush pressures and angles to see how they affect the gradient. Keep your tools clean to avoid muddying the colors. Remember, successful blending depends on how well you understand how colors interact and your control over brush application. Practicing color matching can significantly improve your blending results. By testing and refining these techniques, you’ll develop a steady hand that creates flawless, professional-looking ombré nails every time.
Prep Your Nails to Achieve a Flawless Gradient

Before applying your ombré gradient, make sure your nails are clean and buffed to a smooth surface. Use a proper base coat to create a strong foundation for even color application. These steps help guarantee your gradient looks flawless and lasts longer. Incorporating professional services can also ensure optimal results and durability. Additionally, selecting high-quality nail polishes designed for blending can significantly improve your overall effect. Understanding proper nail preparation techniques and the importance of nail health can further enhance the seamlessness of your gradient.
Clean and Buff Nails
Start by thoroughly cleaning and buffing your nails to create a smooth, even surface. Proper nail buffing removes ridges and imperfections, making certain your gradient will blend seamlessly. Next, focus on cuticle cleaning to eliminate excess skin and debris that can interfere with polish application.
- Use a gentle nail buffer to smooth out the surface, avoiding over-buffing which can weaken nails.
- Carefully push back your cuticles with a cuticle pusher or orangewood stick, then clean around the nails.
- Wipe your nails with a lint-free cloth soaked in a gentle nail cleanser or alcohol to remove oils and residue.
- Ensure your nails are completely dry before moving to the next step for flawless ombré blending.
Use Proper Base Coat
Applying a proper base coat is essential for achieving a smooth and even ombré gradient. The base coat importance lies in creating a uniform surface that helps colors blend seamlessly without streaks or muddying. When you apply it with proper application, you guarantee your nails are protected and ready for flawless color transition. Think of your nails like a canvas:
| Fresh Canvas | Vibrant Paints |
|---|---|
| Smooth, clean surface | Rich, true color payoff |
| No ridges or bumps | Better adhesion |
| Prevents staining | Ensures longevity |
This preparation sets the stage for a flawless ombré. Skipping this step or applying unevenly can lead to patchiness or muddiness. Investing in a high-quality Suprem fabric for your base coat can improve durability and overall finish, ensuring the perfect gradient every time. Additionally, a well-prepared base can help prevent nail staining from highly pigmented colors, maintaining the health and appearance of your nails. Proper nail prep enhances adhesion and creates a more professional-looking result.
Use the Best Tools and Techniques for Smooth Blending

To achieve seamless ombré nails, choosing the right tools and mastering effective techniques are essential. Start with quality brushes designed for gradient work, as they make blending easier. Focus on brush techniques, such as gentle sweeping motions, to create smooth transitions. When it comes to color mixing, blend shades on a palette first to prevent muddy results and guarantee consistent gradients. Use a sponge lightly dipped in the two colors to softly dab and blend the edges. Additionally, keep your tools clean to avoid unwanted mixing or streaks. Proper tool maintenance not only prolongs the life of your brushes but also ensures more precise and even blends. Maintaining the cleanliness of your tools is a crucial aspect of proper technique that affects the overall outcome. Proper tool care helps prevent buildup and contamination, ensuring each application remains flawless. Finally, practice feathering and feathering techniques with your brush to perfect the gradient. These steps help you achieve a flawless ombré effect without muddying the colors or uneven blending. Incorporating proper tool maintenance ensures your brushes stay in optimal condition, leading to more precise and beautiful blends.
Follow These Steps to Create Mud-Free Ombré Nails
Creating mud-free ombré nails involves careful color selection and blending techniques to keep the hues vibrant and distinct. Start by understanding color theory; choose shades that complement each other and avoid muddy combinations. Use high-quality, nail health-friendly products to prevent damage and guarantee longevity. When blending, work quickly and softly to avoid over-mixing colors, which can cause dullness. Keep your tools clean and precise for seamless progressions. To help you select the best shades, refer to this chart:
| Cool Tones | Warm Tones |
|---|---|
| Blue, purple | Red, orange |
| Mint, lavender | Peach, coral |
| Green, teal | Gold, bronze |
| Indigo, mauve | Amber, terracotta |
Fix Common Mistakes That Make Your Ombré Look Muddy
Muddy ombré nails often result from blending colors that are too similar or using too much product, which causes the hues to merge into dull, indistinct shades. To fix this, consider these tips:
- Apply contrasting colors based on color theory, choosing shades that stand out against each other for clearer blending.
- Use minimal product—less is more—to prevent excess buildup that dulls the gradient.
- Blend gradually in small, controlled motions to maintain sharp separation between shades.
- Prioritize nail health by regularly nourishing your nails; healthy nails create a better surface for crisp, vibrant ombré effects.
Maintain and Refresh Your Ombré Nails for Lasting Beauty
Maintaining and invigorating your ombré nails ensures they stay vibrant and beautiful longer. Regular nail care, like moisturizing cuticles and avoiding harsh chemicals, keeps your nails healthy and prevents chipping. To refresh your ombré, consider a light top coat to boost shine and protect the blend. Proper color coordination is key; choose shades that complement each other and your skin tone. When touching up, use a sponge or brush to blend new layers seamlessly, avoiding harsh lines. Schedule regular touch-ups to maintain the gradient effect and prevent fading. Remember, consistent care preserves the integrity of your design, ensuring your ombré nails remain stunning and eye-catching over time.
Frequently Asked Questions
Can Gel or Regular Polish Affect the Ombré Blending Outcome?
Yes, gel versus regular polish can affect your ombré blending outcome because of their polish consistency. Gel polish tends to be thicker and more forgiving, allowing for smoother blends and less muddy results. Regular polish, being thinner, can make blending harder and increase the risk of muddy overlaps. To achieve perfect ombré, choose gel for easier blending, but if you prefer regular polish, work quickly and layer carefully for better results.
What Are the Best Top Coats for Preserving Ombré Nail Gradients?
You want your gradient blending to stay flawless, so choose top coats known for their durability. A gel top coat with high shine seals in the ombré and prevents fading or smudging, making your nails durable and stunning. Regular top coats with long-lasting formulas also work well, locking in the gradient without compromising the color shift. The right top coat guarantees your beautiful ombré remains pristine longer—trust the best for lasting perfection.
How Long Does It Typically Take to Master Ombré Nail Techniques?
It usually takes you a few weeks of consistent practice to master ombré nail techniques. You need to practice patience as you refine your blending skills, ensuring smooth progressions and color harmony. With regular effort, you’ll notice improvement in your gradients. Keep experimenting with different color combinations and blending tools, and over time, you’ll achieve flawless ombré nails that look professionally done.
Are There Specific Brands Recommended for Ombré Nail Colors?
Think of your nail colors like a painter’s palette—brand recommendations can make all the difference. For flawless ombré, try brands like Gelish, OPI, or Essie, which offer smooth, pigmented shades perfect for blending. When choosing colors, opt for a gradual progression and stay within similar tones. These brands provide reliable options that help you achieve a seamless fade without muddying your look, giving your nails a professional finish.
Can At-Home Tools Rival Professional Equipment for Flawless Ombré Nails?
At-home tools can definitely rival professional equipment if you master DIY techniques. Use a good makeup sponge or a small brush to blend colors seamlessly, just like professionals do. Quality brushes and sponges make a big difference, and practicing your blending skills helps achieve a flawless ombré look. While professional tools might be more precise, with patience and the right techniques, you can create stunning ombré nails right at home.
Conclusion
Did you know that properly blended ombré nails can last up to two weeks without turning muddy? By choosing the right colors, prepping your nails, and using the best tools, you can achieve a flawless gradient that stays vibrant. Remember, practice makes perfect—so don’t be discouraged by initial mistakes. With these tips, you’ll enjoy stunning, mud-free ombré nails that elevate your style and boost your confidence every time.