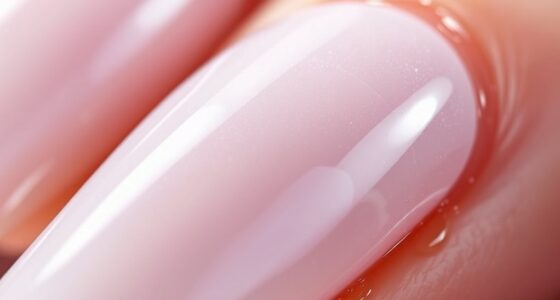
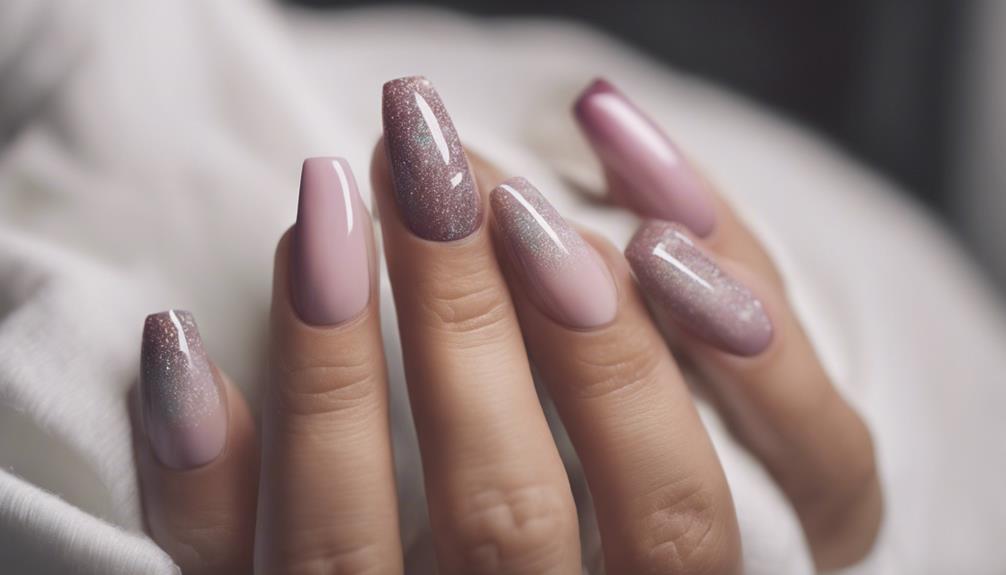
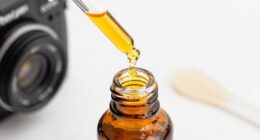
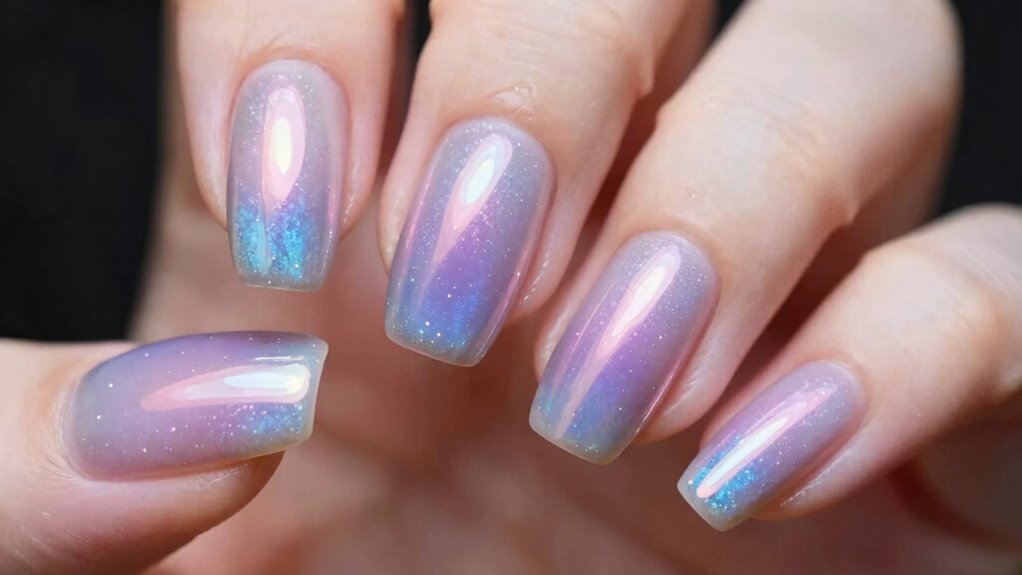
Aura nails use a seamless gradient technique to create a luminous, glow-like effect that looks magical. This look combines smooth color blending with vibrant or soft shades to give your nails an ethereal aura. By carefully choosing your colors and mastering blending tools like sponges or brushes, you can achieve stunning results. If you want to discover the precise steps and tips for perfect aura nails, keep exploring to uncover all the secrets behind this mesmerizing manicure.
Key Takeaways
- Aura nails feature a mesmerizing gradient glow that mimics a luminous aura through seamless color blending.
- The technique uses tools like sponges and brushes to create soft, smooth transitions between shades.
- Color choices evoke specific emotions and reflect personality traits, enhancing personal expression.
- Proper nail prep and layering are essential for achieving a flawless, vibrant gradient effect.
- Finishing touches like shimmer or glitter add depth, while maintenance ensures long-lasting, magical-looking nails.
What Are Aura Nails and Why Are They So Popular?
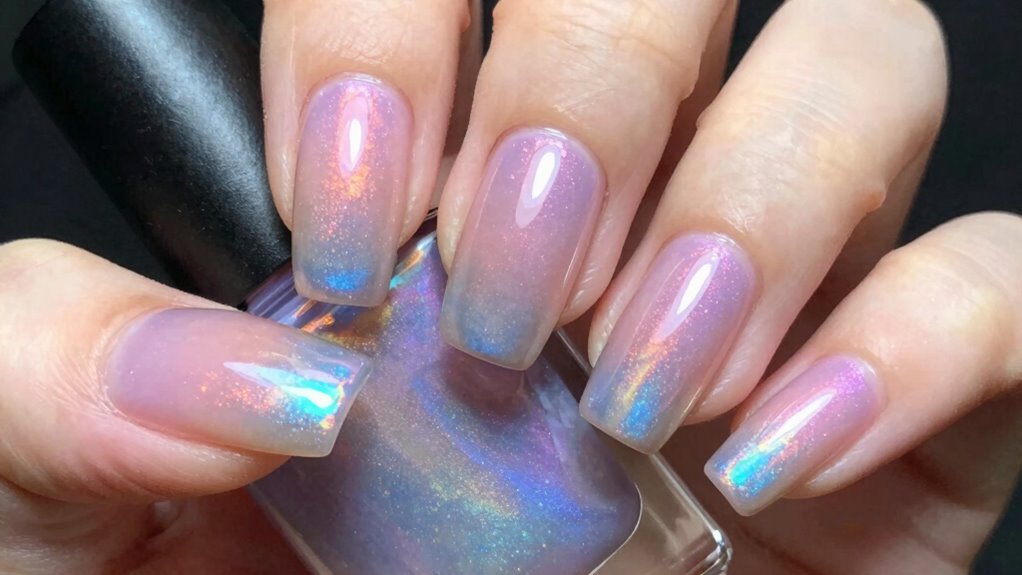
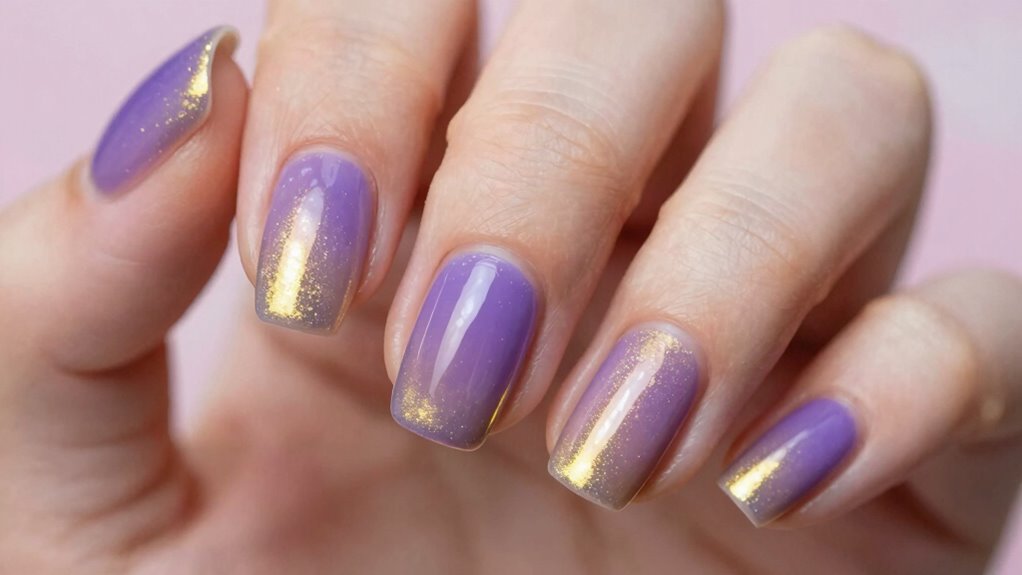
Ever wondered what makes Aura Nails so appealing? It’s their unique blend of nail care and color psychology that draws people in. Aura Nails feature a stunning gradient effect that creates a mesmerizing aura-like glow, making your nails stand out. The technique involves blending colors seamlessly, which not only looks beautiful but also promotes healthy nail care by reducing damage from harsh applications. The popularity stems from how the colors evoke emotions and moods—calm blues, energetic reds, or soothing pastels—highlighting the psychological impact of nail hues. This combination of artistry and emotional expression makes Aura Nails a favorite among fashion-forward individuals. They’re not just stylish; they also allow you to communicate your personality through vibrant, carefully chosen shades. Understanding the lifecycle and performance metrics of nail products can help maintain their beauty and health over time. Incorporating eco-friendly products into your nail routine can further enhance the sustainability of your beauty regimen. Additionally, using quality products with long-lasting pigments ensures that the gradient remains vibrant and intact longer, making your manicure truly magical. Recognizing the importance of product longevity can help you make smarter choices for lasting beauty.
How the Gradient Technique Creates That Magical Aura Effect

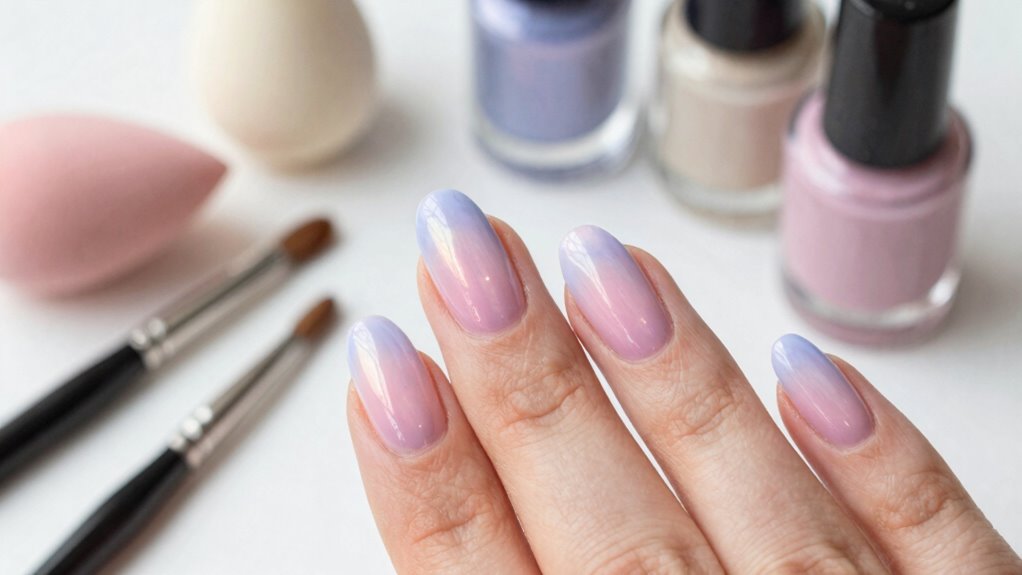
How does the gradient technique create that enchanting aura effect on nails? It hinges on seamless color blending, where different shades gradually transition into each other. To achieve this, you need nail precision—carefully controlling the application to avoid harsh lines or uneven patches. Using sponges, brushes, or airbrushing tools, you layer colors carefully, allowing them to meld naturally. The key is to blend softly, creating a smooth gradient that mimics a glowing aura. This technique guarantees the colors flow effortlessly from one hue to the next, producing that magical, ethereal look. When executed with accuracy and patience, the gradient technique transforms simple nails into captivating works of art that seem to radiate their own light. Additionally, selecting the right tools and materials can significantly improve the smoothness and vibrancy of the gradient effect.
Choosing the Right Colors for Stunning Aura Nails
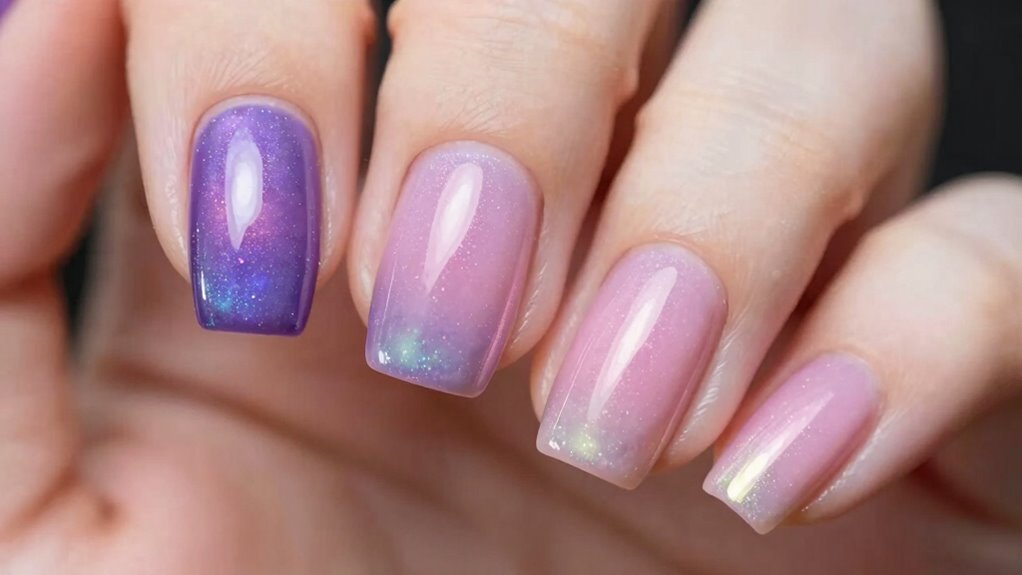
Choosing the right colors is the foundation for achieving stunning aura nails. Your color combinations set the mood and depth of the gradient, making your nails look mesmerizing. Select shades that complement each other and enhance the overall effect. Consider incorporating contrasting or analogous colors to add dimension. Blending techniques are key; smooth transitions between hues create the magical aura illusion. Use a sponge or brush to blend seamlessly, avoiding harsh lines. Start with a light base color and gradually layer darker shades for depth. Think about the mood you want—soft pastels for a dreamy feel or bold, vibrant hues for a striking look. The right color choices and blending techniques ensure your aura nails look harmonious, eye-catching, and absolutely stunning. Additionally, understanding the color temperature can help you choose shades that evoke warmth or coolness, enhancing the overall effect. Paying attention to nail polish quality also ensures smooth application and long-lasting results, making your aura nails truly stand out. When selecting your colors, considering color psychology can help you create designs that evoke specific emotions or themes. For best results, consider exploring trendy nail art techniques to add extra flair and uniqueness to your design. Moreover, selecting the appropriate nail polish finish can influence the overall look, whether matte, glossy, or shimmer, to suit your style preferences.
Step-by-Step: How to Create Aura Nails at Home
Start by gathering all the tools you need, like brushes, sponges, and your chosen nail polish colors. Next, practice blending the colors smoothly to create that beautiful aura effect. You can also explore cloud computing compliance practices to ensure your designs meet safety standards if you’re sharing your work online. Incorporating professional-grade nail tools can help achieve more precise and long-lasting results. Additionally, understanding field-of-view and imaging-scale concepts can inspire creative gradient effects similar to those used in deep-sky imaging. Being aware of digital asset management strategies can also help you organize your design files efficiently. For the best results, consider experimenting with color theory fundamentals to enhance your gradient transitions and overall design harmony. Once you’re comfortable with the techniques, you’re ready to create stunning aura nails at home.
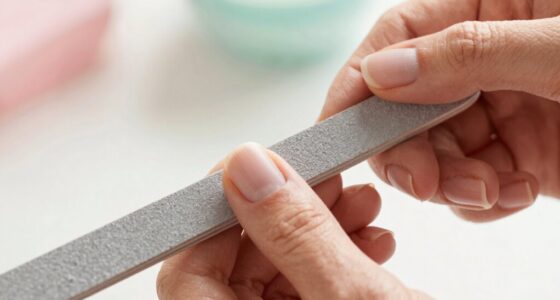
Gather Necessary Tools
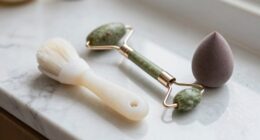
To create stunning aura nails at home, you’ll need to gather a few essential tools. Proper tool selection guarantees smooth color blending and a flawless gradient effect. First, pick up high-quality nail brushes, including a flat blending brush and detail brush for precision. Next, grab a sponge for creating soft progressions in your gradient. You’ll also need a base coat and top coat to protect your design. Don’t forget alcohol wipes or a clean brush to perfect the blending process. Finally, choose your nail polishes or gel colors—opt for shades that complement each other for beautiful color blending. Having these tools ready makes it easier to achieve that magical aura effect you’re aiming for. Additionally, understanding Free Floating technique can help you achieve seamless color transitions in your gradient designs. To ensure the best results, consider practicing color blending techniques on practice nails before working on your final design. Incorporating vintage-inspired tools and techniques can also add a unique touch to your nail art, giving it a timeless appeal. Being familiar with safe application practices ensures your nails stay healthy and the design lasts longer. Practicing proper skin protection methods can further enhance the overall quality of your nail art and prevent potential irritation.
Master Gradient Blending
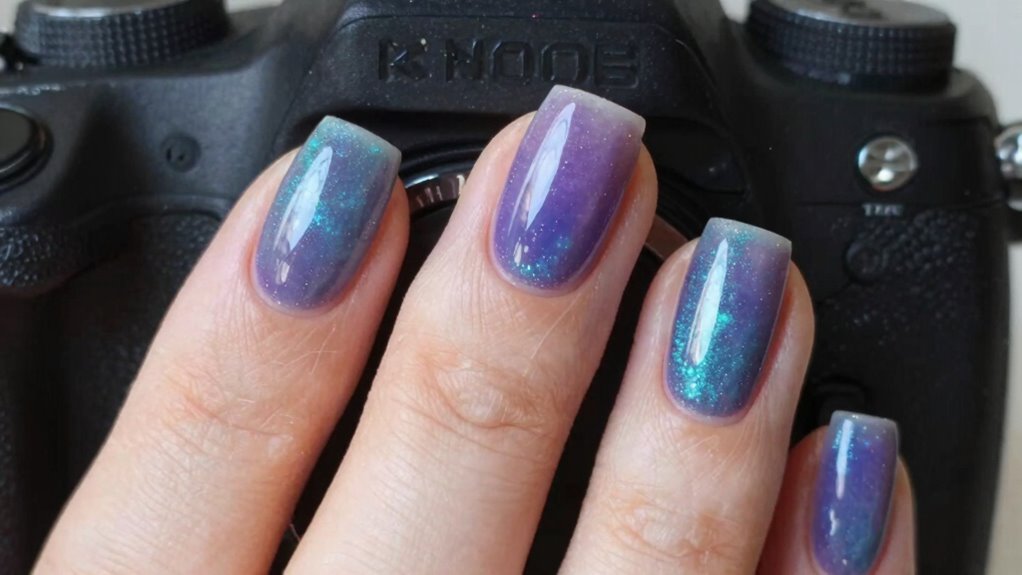
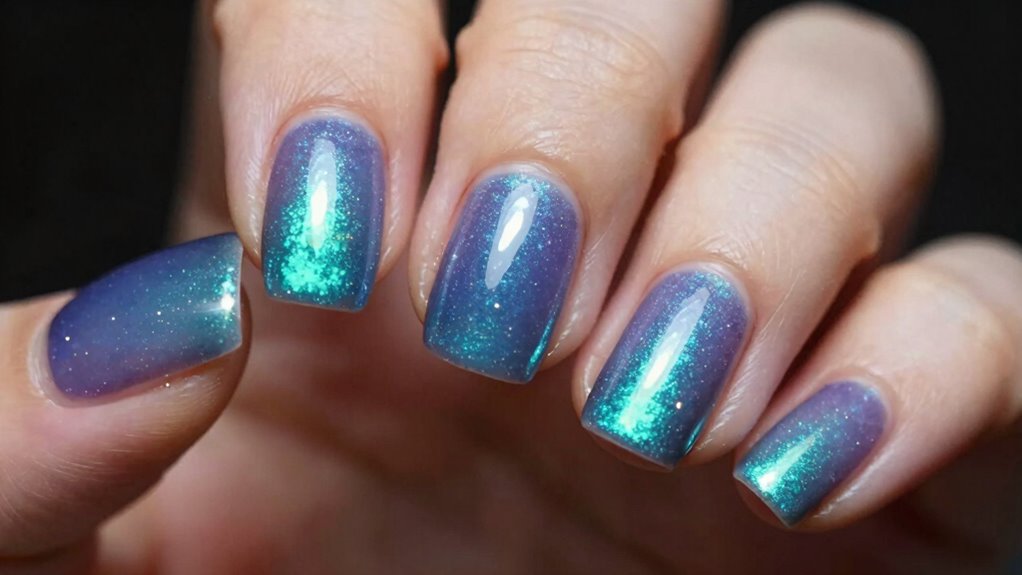
Achieving a seamless aura effect hinges on mastering gradient blending techniques. To do this, gently blend your chosen colors by applying small, overlapping strokes with a sponge or brush, working from the lightest to the darkest hue. Keep the colors soft and well-mixed to guarantee smooth progressions. Focus on maintaining design symmetry by evenly distributing the color blend across your nail surface, preventing harsh lines or uneven patches. Use a clean sponge or brush to lightly dab and soften the edges, creating a natural gradient. Practice consistent pressure and blending motions to achieve a professional look. Proper technique ensures a smooth, professional finish that enhances the overall effect. Additionally, paying attention to color harmony can elevate the visual appeal of your gradient, making your aura nails look even more magical. Remember, patience is key—taking your time will result in a flawless, magical aura that appears seamless and vibrant. Incorporating professional tools such as quality sponges or brushes can further improve your blending precision and overall results.
Essential Tools and Products for Perfect Aura Nails
Having the right tools and products is essential for creating flawless Aura Nails. To achieve smooth color blending and a stunning gradient effect, you need quality nail art tools and specific products. First, invest in a good-quality fan brush or sponge for seamless color transitions. Second, keep a set of fine detail brushes for precise application and touch-ups. Third, choose high-pigment gel or acrylic colors that blend easily. Fourth, have a reliable UV or LED lamp to cure your layers perfectly. Finally, use a top coat to seal the design and add a glossy finish. These tools and products help you master the gradient technique, ensuring your Aura Nails look magical and professional every time.
Common Mistakes to Avoid When Applying Aura Nails
Even with the right tools, mistakes can easily happen if you’re not careful during the Aura Nails application process. One common error is choosing poor color combinations that don’t blend well or clash, ruining the gradient effect. To prevent this, select complementary or harmonious shades. Another mistake is rushing the application; improper techniques like uneven blending or overloading polish can create streaks or harsh lines. Be patient and use light, gradual strokes to achieve a smooth gradient. Also, skipping proper preparation, like cleaning the nails or applying a base coat, can lead to uneven color absorption. Pay attention to your application techniques—consistent pressure and blending are key. Avoid these pitfalls to ensure your Aura Nails look seamless and magical.
How to Make Your Aura Nails Last and Keep Them Shiny
To keep your Aura Nails lasting and shiny, start with proper nail preparation to guarantee a smooth surface. Always apply a quality top coat to seal in color and enhance gloss. Regular maintenance routines, like reapplying top coat and avoiding harsh chemicals, help preserve their look over time.
Proper Nail Preparation
Proper nail preparation is essential to guarantee your Aura Nails last longer and stay shiny. Before starting your nail art, ensure your nails are clean and free of oils, which can hinder adhesion and affect color blending. Gently push back cuticles and file nails to create a smooth surface for better application. Moisturize cuticles to prevent dryness, but avoid excess oils that can weaken the polish. Use a primer if needed to enhance durability. Properly prepped nails help the gradient technique look seamless and vibrant. Remember, a clean, dry surface is key to achieving a polished, long-lasting aura effect. With these steps, your nail art will be more durable, and your color blending will look flawless every time.
Use Quality Top Coat
Using a high-quality top coat is essential to protect your Aura Nails and maintain their shine for longer. A good top coat enhances color blending, ensuring the gradient transition stays smooth and vibrant. It also seals in the colors, preventing chipping and fading. Applying a top coat evenly over your nails creates a glossy finish that makes your gradient look magical and professional. For ideal nail longevity, choose a top coat with strong adhesion and durability. Reapply it every few days to keep your nails protected and shiny. This simple step helps preserve your nail art, preventing damage from daily activities. With the right top coat, your Aura Nails will stay stunning and fresh, showcasing that mesmerizing gradient effect for days to come.
Regular Maintenance Routines
Maintaining your Aura Nails’ vibrant shine and flawless appearance requires regular care beyond just applying a top coat. To preserve nail health and extend your manicure’s life, stick to a consistent maintenance schedule. This includes gentle nail cleaning, moisturizing cuticles, and avoiding harsh chemicals. Regularly check for chips or cracks and address them immediately to prevent further damage. Protect your nails by wearing gloves during chores and limiting exposure to water. Keep your nails hydrated and avoid picking at the gradient. Proper maintenance ensures they stay shiny and beautiful longer. Incorporate these routines into your weekly schedule to maintain the stunning gradient effect and nail health, making your Aura Nails look magical every day.
Creative Variations and Inspiration for Unique Aura Nail Designs
To create truly unique aura nail designs, you can experiment with a variety of color combinations, patterns, and finishes that reflect your personal style. Combining bold hues with soft pastels can produce eye-catching gradients, while metallic or holographic finishes add a magical touch. Play with different design motifs like geometric shapes, floral accents, or abstract swirls to enhance the visual interest. Mixing matte and glossy textures creates contrast, making your nails stand out even more. You might also incorporate subtle glitter or shimmer for an extra layer of depth. Don’t hesitate to blend unexpected color pairings or layer multiple techniques for a look that’s uniquely yours. The key is to stay creative and let your inspiration guide you toward eye-catching, personalized aura nail designs.
Should You Try DIY or Visit a Professional for Aura Nails?

Deciding whether to try DIY aura nails or visit a professional largely depends on your skill level, desired outcome, and the complexity of the design. If you’re confident with nail art, DIY tips can save money and allow creative freedom. However, for intricate gradient techniques and flawless blends, professionals offer expert benefits like precision and high-quality tools.
Consider these factors:
- Your experience with nail art
- The complexity of your desired aura effect
- Time you can dedicate to the process
- Access to quality supplies
- Budget for professional services
DIY tips can help you achieve stunning results at home, but a professional ensures a polished, long-lasting finish. Weigh these points to decide whether to venture into DIY or book a salon appointment.
Frequently Asked Questions
How Long Do Aura Nails Typically Last Before Needing a Touch-Up?
Aura nails typically last around two to three weeks before needing a touch-up. To maintain their vibrant, magical look, you should expect to schedule a touch-up every 2-3 weeks. Proper nail care and avoiding harsh activities can help extend their nail longevity. Keep an eye on any chips or fading, and plan your touch-up accordingly to keep your aura nails looking fresh and stunning.
Are Aura Nails Suitable for All Skin Tones and Nail Shapes?
Yes, aura nails suit most skin tones and nail shapes. You’ll find skin tone compatibility varies, but the gradient effect enhances diverse complexions beautifully. For nail shape considerations, this technique works well on almond, oval, and square nails, accentuating their natural curves. If you have unique nail shapes, a skilled technician can customize the gradient to complement your style, ensuring you get a stunning, personalized look every time.
Can Aura Nails Be Customized With Glitter or Embellishments?
Yes, you can customize aura nails with glitter accents and embellishment options. You can add sparkle to your gradient design or incorporate small charms and rhinestones for extra flair. Talk to your nail technician about your desired embellishments, and they’ll help create a personalized look. Whether you want subtle glitter or bold embellishments, aura nails are versatile and perfect for making a unique style statement.
What Are the Best Practices for Removing Aura Nails Safely?
To remove aura nails safely, you should start with gentle nail polish removal, avoiding harsh acetone that can damage your nails. Opt for a proper acrylic soak-off method by soaking cotton balls in acetone, then wrapping them with foil to loosen the gel or acrylic. Be patient, avoid peeling, and gently push off any residue with a cuticle stick. This approach keeps your nails healthy and minimizes damage.
Do Aura Nails Require Special Maintenance Beyond Regular Manicures?
Yes, aura nails need some extra care beyond regular manicures. You should use special nail tools to prevent damage during removal, and avoid harsh chemicals. Additionally, since aura nails often involve UV light curing, protect your skin with sunscreen and limit exposure. Regular maintenance, like moisturizing cuticles and avoiding excessive water, helps keep your aura nails looking vibrant and healthy longer.
Conclusion
Now that you know the magic behind aura nails, it’s time to create your own enchanting look. Whether you choose to master the gradient technique at home or visit a pro, remember—your nails are a canvas for self-expression. Don’t let fear hold you back; embrace the art and let your creativity shine brighter than ever. After all, isn’t life just a beautiful, ever-evolving masterpiece waiting to be painted?